Once you’ve got Arduino and any necessary drivers installed we can move on to installing the “Little Robot Friends for Arduino” Library. The most recent version of the library should be available here:
- Current verion of LittleRobotFriends for Arduino Library
- All versions of LittleRobotFriends for Arduino Library
Adding the Library to Arduino
Download the zip file above, put it onto your desktop and open it. Inside you’ll see three folders and a file called ‘readme.txt’. That ‘readme.txt’ file contains the same instructions as written here. The folders are filled with all the good stuff:
‘hardware’ : this folder contains the instructions required to tell the Arduino software how to communicate with our robot ‘libraries’ : this folder contains all the library code and example files you’ll need for programming a robot ‘documentation’ : this folder contains a copy of this documentation that you can keep on your computer for checking when you don’t have an internet connection. Just open it in any web browser by double-clicking the file ‘index.html’
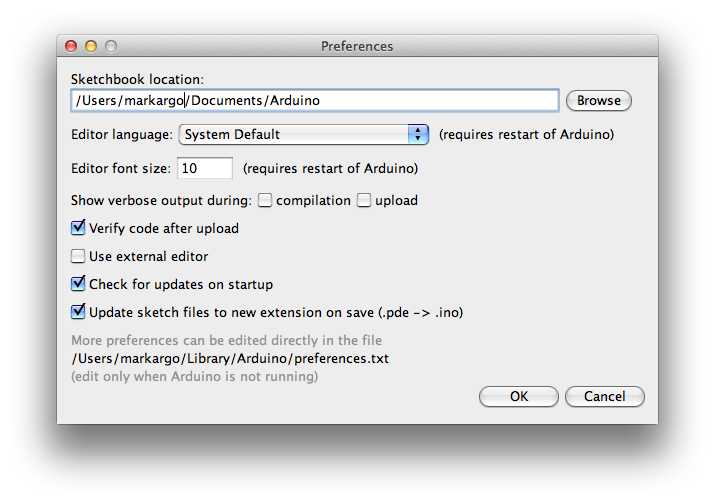
Before we can install these files, you’re going to need to know the location of your Arduino sketchbook folder. This folder is typically called ‘Arduino’ and located in your ‘Documents’ or ‘My Documents’ folder, and is where your Arduino ‘sketches’ are saved. If you don’t know where this folder is, open up the Arduino IDE software and on the top menu navigate to ‘file > preferences’. In there you should see a text box with the path to your sketchbook (see photo below). Open up that folder.
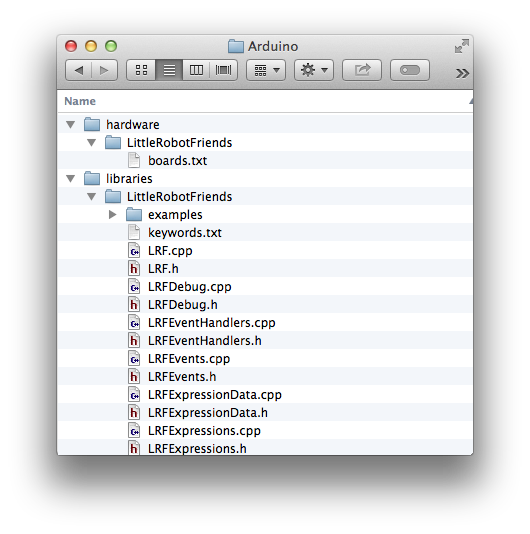
Inside your sketchbook folder you may already see another folder called ‘libraries’. You may even see a folder called ‘hardware’. Or you may see no folders at all. If you already have a ‘libraries’ or ‘hardware’ folder in your sketchbook, copy the ‘LittleRobotFriends’ folders inside our ‘libraries’ or ‘hardware’ folders to the sketchbook folders. If you don’t see a ‘libraries’ or ‘hardware’ folder in the sketchbook, just copy the whole folder from our .zip file into the sketchbook. Folder, folder, folder. In the end, the result should look like this:
Confirming the Library Works
Now we can open the Arduino IDE software. If it’s already running, relaunch it to load the new library. Let’s confirm that our installation worked:
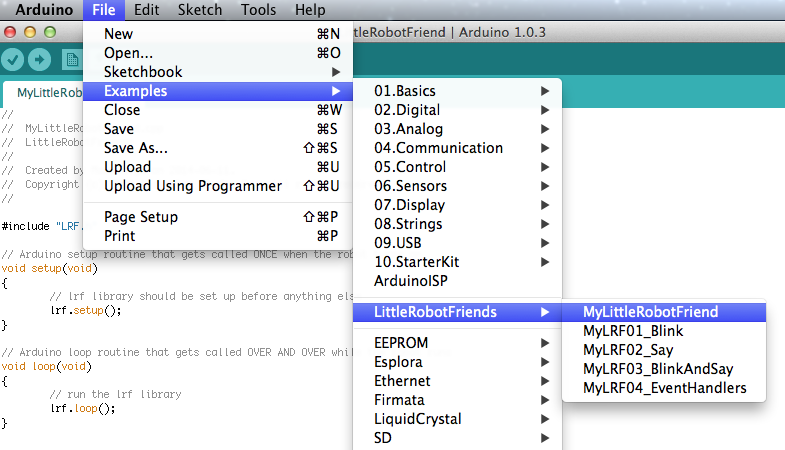
Under the top menu, navigate to ‘file > examples’. There should be a menu item called ‘LittleRobotFriends’. Inside there are all the tutorial examples for learning how to program your robot. If you don’t see the ‘LittleRobotFriends’ folder, recheck the steps above.
Under the top menu, navigate to ‘tools > boards’. There should be another menu item called ‘LittleRobotFriends’. That means Arduino can now talk to your Little Robot Friend! If you don’t see this option, recheck the steps above.

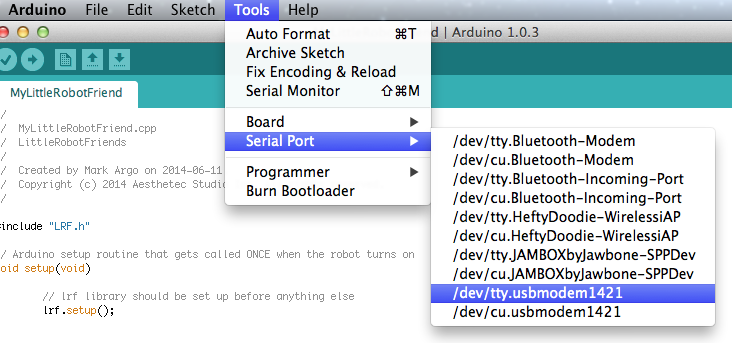
Now you can plug your Little Robot Friend into your Hacker Dock, and your Hacker Dock into your computer. If your drivers are installed properly you should be able to navigate to ‘tools > serial port’ and see an option that looks like ‘tty.usbmodem-XXXX’ (mac) or ‘usb somethin’ (windows). Select that option.
Let’s test to make sure everything is working. Navigate to ‘file > examples > LittleRobotFriends > MyLittleRobotFriend’ and select it. This should open the ‘MyLittleRobotFriend’ sketch. This sketch contains the minimum amount of code required for getting a Little Robot Friend to work.
First let’s verify that the code is working. At the top of the sketch window, click on the verify button. This will ‘compile the code’, which means that the software is turning the LRF code into a file that can be uploaded to the robot. At the bottom of the sketch window you should see the text ‘Compiling sketch…’ or ‘Done compiling’, the latter meaning that our code works!
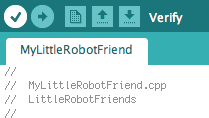


Next let’s upload the code to the robot. Make sure your Little Robot Friend has charged batteries, and that it’s properly plugged into your Hacker Dock. At the top of the sketch window, click on the upload button. At the bottom of the sketch window you should see the text ‘Uploading…’. This process can take 20-30 seconds, so be patient if it doesn’t change.
If there is a problem you’ll see ‘Uploading failed’. Check here for some troubleshooting steps.
If everything goes well you’ll see ‘Upload successful!’ and your robot should do it’s wake up sound. You’re now ready to begin programming your robot! Check these chapters to learn more about the robot ‘hardware’ and ‘firmware’ .
